
NBI CLEARANCE · PHILIPPINES
NBI Clearance Online Appointment 2026 Complete Step-by-Step Guide
Booking an NBI clearance online appointment sounds simple, but it can trip you up if you do not know what to expect. This guide walks you through everything from start to finish — whether you are applying for the first time, renewing an expired clearance, or hunting for an open slot.
14 in-depth guides · Structure updated October 2026 · Independent & free
| Fee | ₱130.00 total (₱115.00 processing + ₱15.00 e-payment charge) |
|---|---|
| Valid for | 1 year from issuance |
| Release time | Same day if no HIT; a few days to weeks with HIT |
| Branch visits | 1 visit on your appointment date |
| Official portal | clearance.nbi.gov.ph |
Official Information — Accurate and Updated for 2026 · Step By Step Guide — Easy to follow instructions · Tips & Solution — Solve common problems and save time · Fees & Payments — Complete list of fees and payment options
Which describes you?
How do I book an NBI clearance online appointment?
Go to clearance.nbi.gov.ph and create an account (or log in). Fill out your personal details, pick the valid ID you will present, choose your branch and appointment date, then pay the ₱130 fee through an accredited channel. Save your reference number, then appear at the branch on your scheduled date with your ID, a photocopy, and your appointment confirmation.
What Is NBI Clearance and Why Do You Need It?
NBI Clearance is an official document issued by the National Bureau of Investigation in the Philippines. It certifies that a person has no pending criminal case or derogatory record in the NBI database at the time of application. Employers, government agencies, banks, and immigration offices commonly require it before processing your application.
You will need NBI clearance for job applications, business permit processing, travel abroad (NBI Clearance Color for Abroad), visa applications, loan transactions, and various government transactions. This Clearance is valid for one year from the date of issuance. Because it expires annually, many Filipinos find themselves applying or renewing it every year.
The NBI clearance also serves as a form of identification, as it carries your photo, full name, and a unique QR code that can be scanned to verify its authenticity. While it is not classified as a primary government ID, many institutions accept it as a valid supporting document.
How to Book an NBI Online Appointment
If you just need the basic steps fast, here they are:

Go to clearance.nbi.gov.ph
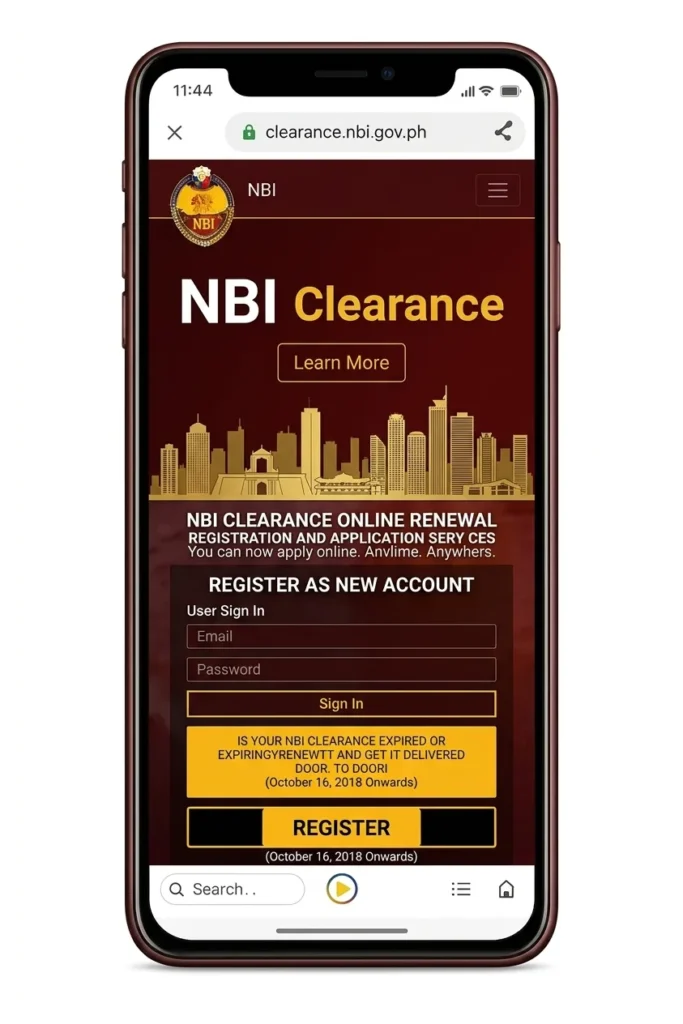

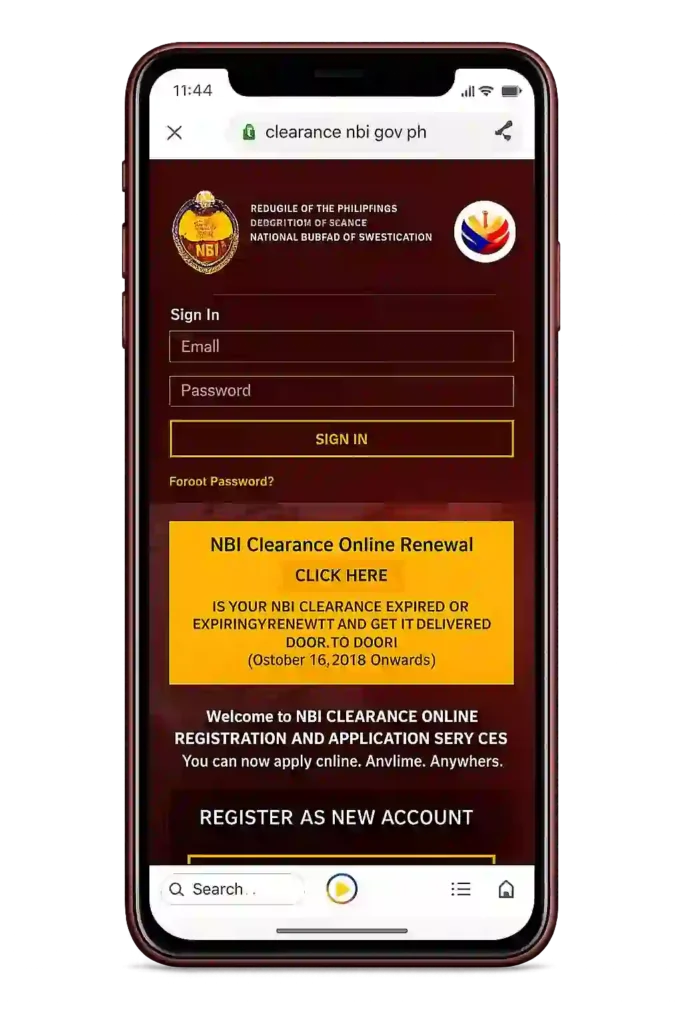
Create an account or log in

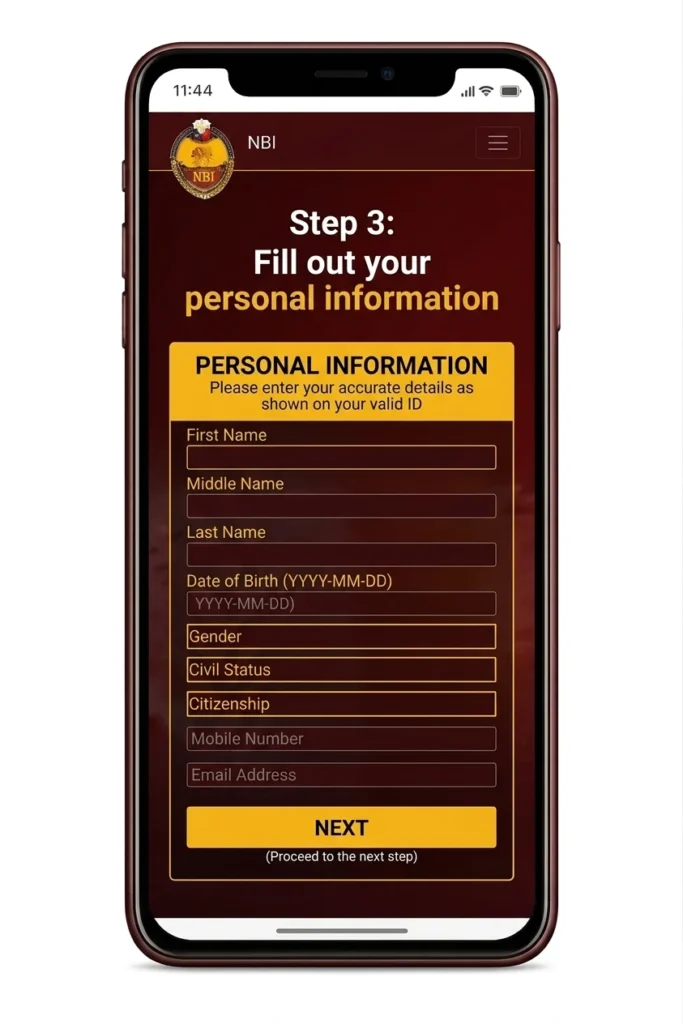
Fill out your personal information

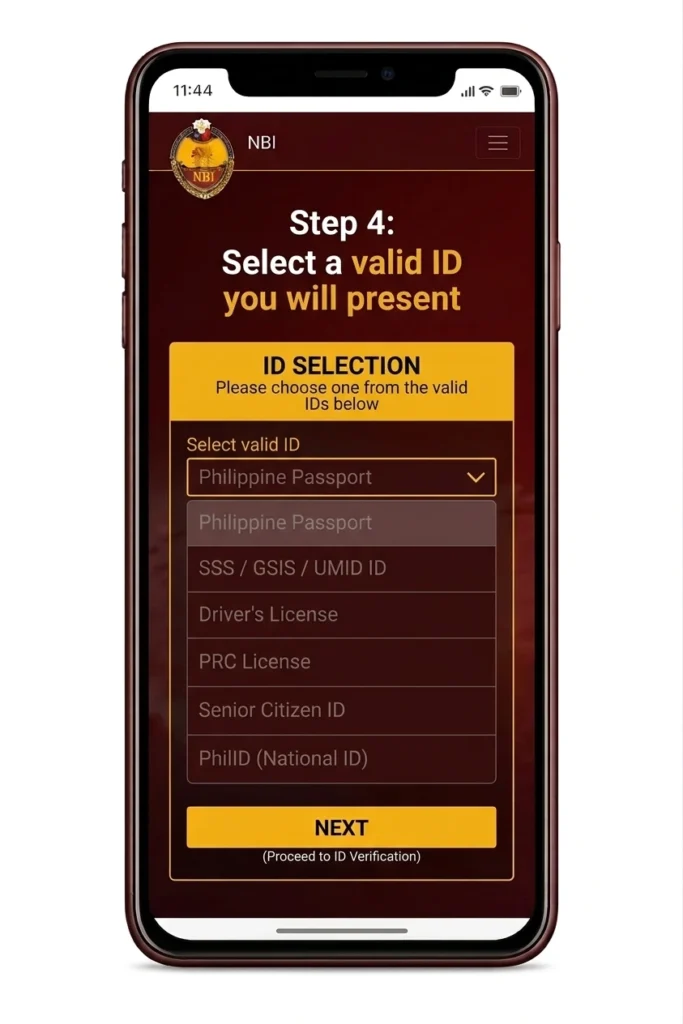
Select a valid ID you will present

Choose your preferred NBI branch and appointment date
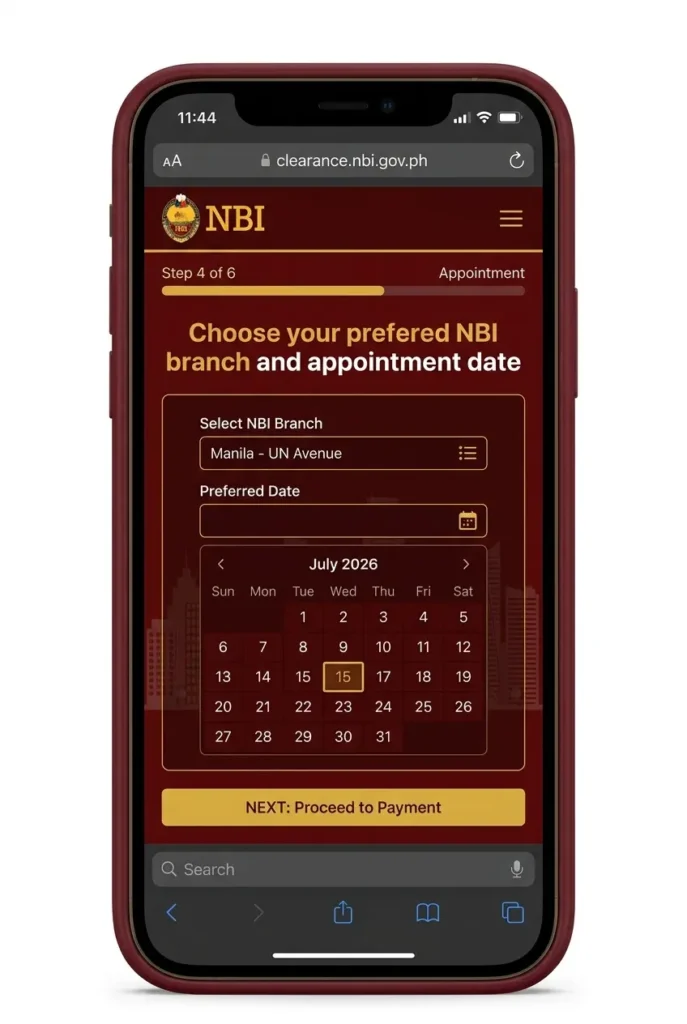

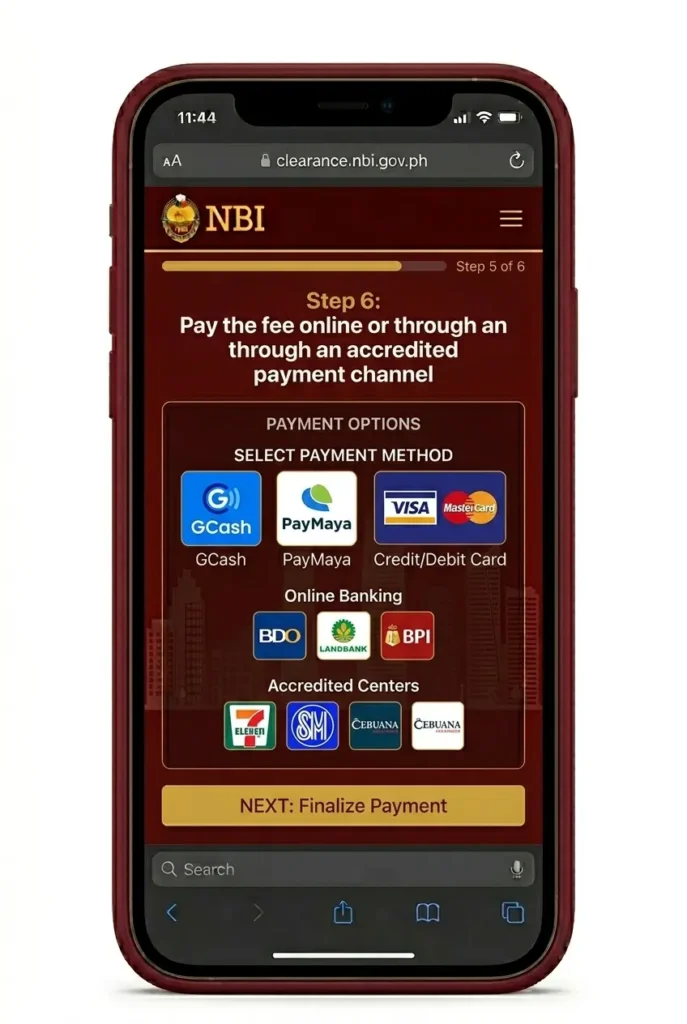
Pay the fee online or through an accredited payment channel

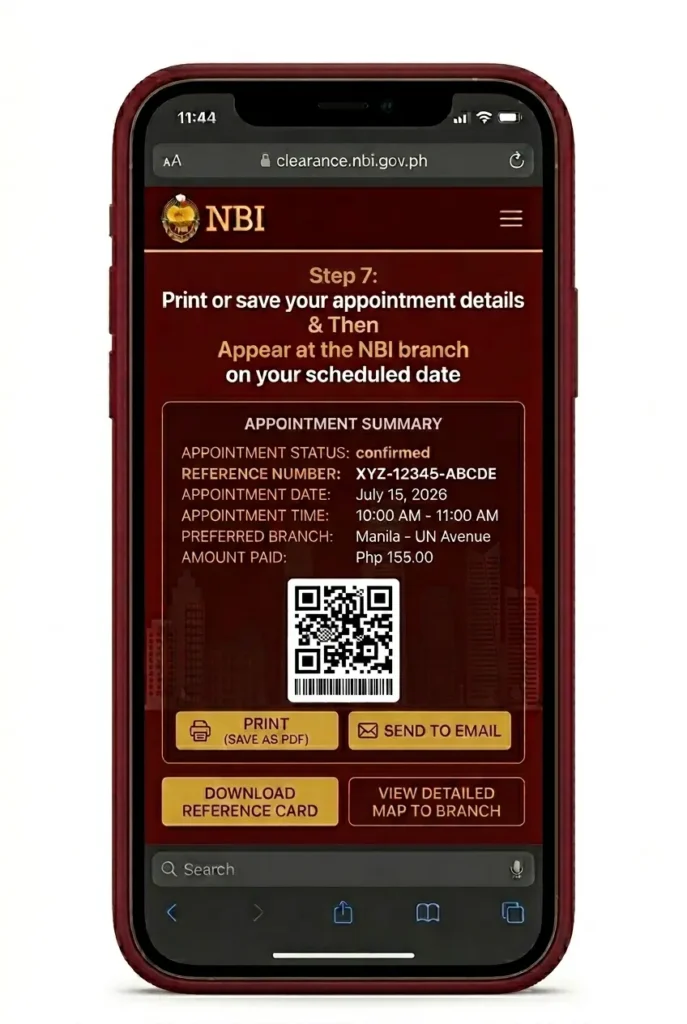
Print or save your appointment details

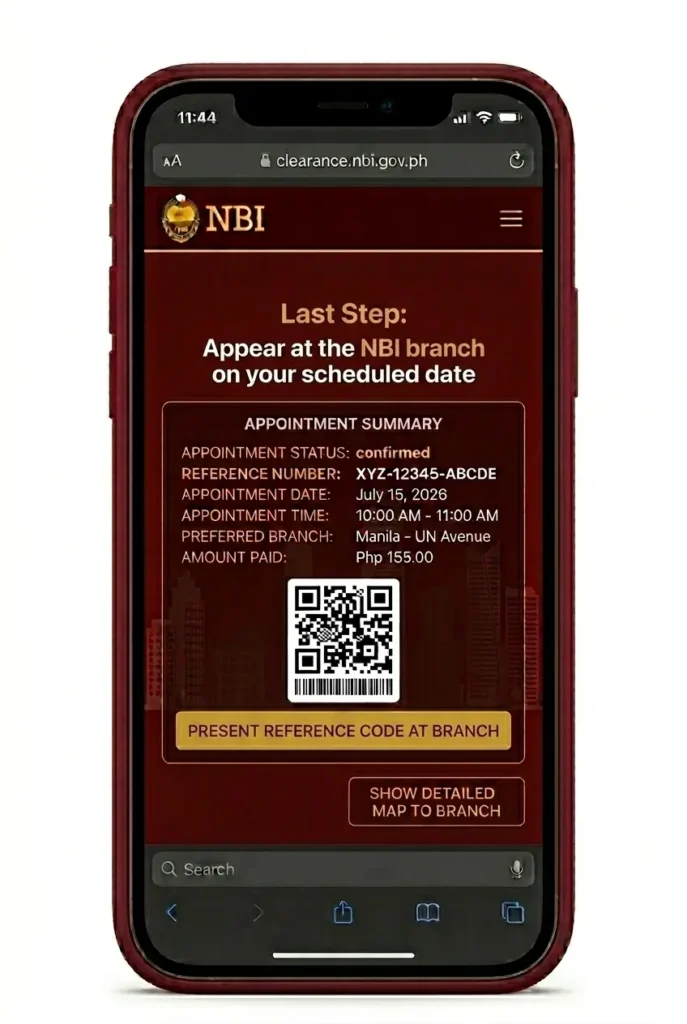
Appear at the NBI branch on your scheduled date
NBI Clearance Requirements Before You Book
Regular applicants need just three things: one valid government-issued ID (bring the original plus a photocopy), the reference number from your online application, and your payment confirmation or official receipt. Going to the branch unprepared is one of the most common reasons applicants get turned away.
First-time job seekers may get the clearance free under Republic Act 11261. You must be a Filipino citizen applying for employment for the very first time, and you will need a barangay certificate confirming your first-time jobseeker status. Note that the exemption can only be used once.
The NBI accepts one valid ID with your photo and signature, including the Philippine Passport, Driver’s Licence, SSS/UMID Card, PhilHealth ID, Voter’s ID, National ID (PhilSys), Postal ID, PRC Licence, TIN Card with photo, Senior Citizen ID, PWD ID, or a School ID for students.
Make sure the name and details on your ID exactly match your online application — any discrepancy can cause problems at the branch.
How to Get an NBI Online Appointment (Step-by-Step)
Go to the Official NBI Website
Open your browser and go to https://clearance.nbi.gov.ph. This is the only official website for NBI clearance online appointment and registration. Be careful with fake or unofficial sites that look similar — always double-check the URL before entering your personal information.
Create an Account or Log In
If you are a new applicant, click the registration button and fill in your email address, mobile number, and a password. If you already have an existing account from a previous application, simply log in using your credentials. Keep your login details somewhere safe because you will need them again when you renew.
Verify Your Account via OTP
After registering, the system will send a one-time password (OTP) to your mobile number or email. Enter the OTP within the time limit to verify your account. If you do not receive the OTP, check your spam folder or request a resend. Make sure your mobile number is active and can receive SMS messages.
Complete Your Applicant Information Form
Fill in your personal details accurately. This includes your full legal name, date of birth, place of birth, address, and civil status. Double-check everything before moving forward the NBI is strict about matching your application details with your ID. Errors at this stage can cause a HIT flag or delays in releasing your clearance.
Apply for Clearance and Select Your Valid ID
Click “Apply for Clearance” on your dashboard. The system will ask you to select which valid ID you will present at the branch. Choose the ID you actually plan to bring. The information on that ID must match your application form exactly.
Choose Your NBI Branch and Appointment Schedule
Select the NBI branch nearest to you or most convenient for your schedule. The system will show available appointment slots for that branch. Slots fill up fast, especially in major cities like Manila, Cebu, Davao, and Quezon City. If your preferred branch has no available slots, check back the next day as new slots are released regularly.
Choose Your Payment Method and Pay the Fee
Once you confirm your appointment, you will be directed to the payment screen. Choose your preferred payment option GCash, Maya, BancNet, 7-Eleven CliQQ, Bayad Center, over-the-counter bank payment, or online banking. Complete the payment before your appointment date. Your appointment is not fully confirmed until payment is made.
Save or Print Your Appointment Details
After payment, the system will generate your appointment details and reference number. Save a screenshot or print a copy of this page. You will need to present this at the NBI branch on your appointment day. It is also a good idea to take note of your reference number separately.
Appear at the NBI Branch on Your Appointment Date
Go to your chosen NBI branch on your scheduled date and time. Arrive at least 15 to 30 minutes early to avoid any rush. Bring your printed or digital appointment confirmation, your valid ID, and a photocopy of that ID.
NBI Clearance Fees and Payment Methods
Standard NBI Clearance Fee
|
Fee Type |
Amount |
|---|---|
|
NBI Clearance Processing Fee |
₱115.00 |
|
E-Payment Service Charge |
₱15.00 |
|
Total |
₱130.00 |
|
First-Time Job Seekers |
FREE (with Barangay Certificate and First-Time Job Seeker certification) |
Note: Delivery fees apply separately if you opt for door-to-door delivery of your clearance.
Pay the ₱130.00 fee online or through an accredited channel before your appointment. Local applicants can use GCash, Maya (formerly PayMaya), BancNet Online, 7-Eleven CliQQ, Bayad Centers, or a debit or credit card via the NBI portal. Applicants abroad can pay through Philippine local banks with online banking, an international credit or debit card, international GCash, or the Philippine Embassy at some overseas posts.
Pay only through these official channels. Never pay a third-party agent or fixer claiming to process your clearance.
NBI Appointment Schedule: Tips for Getting a Slot
One of the most frustrating parts of the NBI online appointment process is finding available slots, especially in Metro Manila and other high-demand cities. Here are practical tips that actually help:
If all appointment slots for your city are taken, you are not required to book in the same city where you live. You can choose any NBI branch nationwide.
What to Bring on Your NBI Appointment Day
On your appointment day, bring these four things:
- Your appointment confirmation (printed or digital) showing the reference number from your online application.
- The original valid ID you selected during registration.
- A photocopy of that valid ID.
- Your payment receipt or confirmation.
Do not forget your appointment details — you will need them at the entrance to check in. Make sure the ID you bring is the same one you selected when you registered, and that the name on it matches your online application exactly. Dress in appropriate attire for your branch visit.
What Happens at the NBI Branch
At the branch, the process follows six quick stages. First, queue at the entrance and present your appointment confirmation with your reference number. Staff will then verify your valid ID against your application details. Next, your fingerprints are scanned electronically for biometrics, followed by a digital photo — you do not need to bring your own photo.
The system then checks your record for any criminal cases or derogatory information. If there is no HIT, your clearance is printed and released the same day. If you get a HIT, you will be asked to wait for verification, which can take a few days to weeks.
Understanding NBI HIT Status
A “HIT” means the NBI system found a record matching your name or details — usually another person with a similar name, but it can also flag an actual case. Do not panic; a HIT does not mean you are guilty of anything.
If you get a HIT, you will be asked to go to the NBI verification section and present additional documents to confirm you are not the same person as the flagged record. Bring extra valid IDs if you have them.
No HIT means your clearance is released the same day. With a HIT, releasing takes a few days to weeks while verification is completed.
|
Status |
Meaning |
Releasing Time |
|---|---|---|
|
No HIT |
No matching record found |
Same day |
|
HIT |
Matching record flagged for review |
Few days to weeks |
NBI Clearance Renewal Appointment Online
NBI clearance renewal follows almost the same process as a new application. Log into your existing NBI clearance account — do not create a new one — and book your renewal appointment online.
Some branches offer a streamlined Quick Renewal option for clearances that expired recently. Check if your branch supports it when booking.
Note that renewal still requires an online appointment; walk-in renewals are not accepted. The fee and requirements are the same as a new application.
How to Reschedule or Cancel Your NBI Appointment
Need to change your appointment? You can reschedule through your NBI clearance account dashboard, as long as you do it before your appointment date. Simply log in, find your appointment, and choose a new available slot.
You can also cancel your appointment, but note that the fee you have already paid is typically non-refundable. If you reschedule, check whether your payment carries over to the new slot or if you need to pay again — the rules can change, so verify on the official NBI website.
NBI Online Appointment by City
The NBI online appointment system covers branches nationwide. Here is a list of major cities where you can book an NBI appointment online:
All bookings go through the same official website regardless of your chosen city: clearance.nbi.gov.ph.
How long it really takes
Register
Create your account on clearance.nbi.gov.ph with your email and mobile number. Verify via the OTP sent to you — this takes just a few minutes.
Pay
Pay the ₱130.00 fee online or through an accredited channel. Payment confirmation is usually immediate, but allow up to a few hours for it to reflect.
Book
Choose your branch and pick an available appointment slot. Slots fill fast — check early in the morning or try mid-week dates.
Visit
Go to the branch on your appointment date. Arrive 15 to 30 minutes early with your requirements. The branch process is usually quick.
Release
Get your clearance the same day if there is no HIT. If you get a HIT, releasing takes a few days to weeks for verification.
Mistakes that cost applicants time and money
- Going to the branch unprepared. Arriving without your reference number, valid ID, or payment receipt means getting turned away at the entrance.
- Using a different ID than the one you registered. The ID you present must match the one you selected during online registration.
- Name mismatch. The name on your ID must exactly match your online application — any discrepancy causes delays.
- Paying through fixers. Only use official payment channels. Never pay a third-party agent claiming to process your clearance.
- Booking multiple slots. Do not book multiple appointments for the same application — it clogs the system and wastes slots.
- Missing your slot without rescheduling. Reschedule through your dashboard before your date, or you will need to rebook and pay again.
- Arriving late or without requirements. Arrive 15 to 30 minutes early with all four requirements to avoid forfeiting your slot.
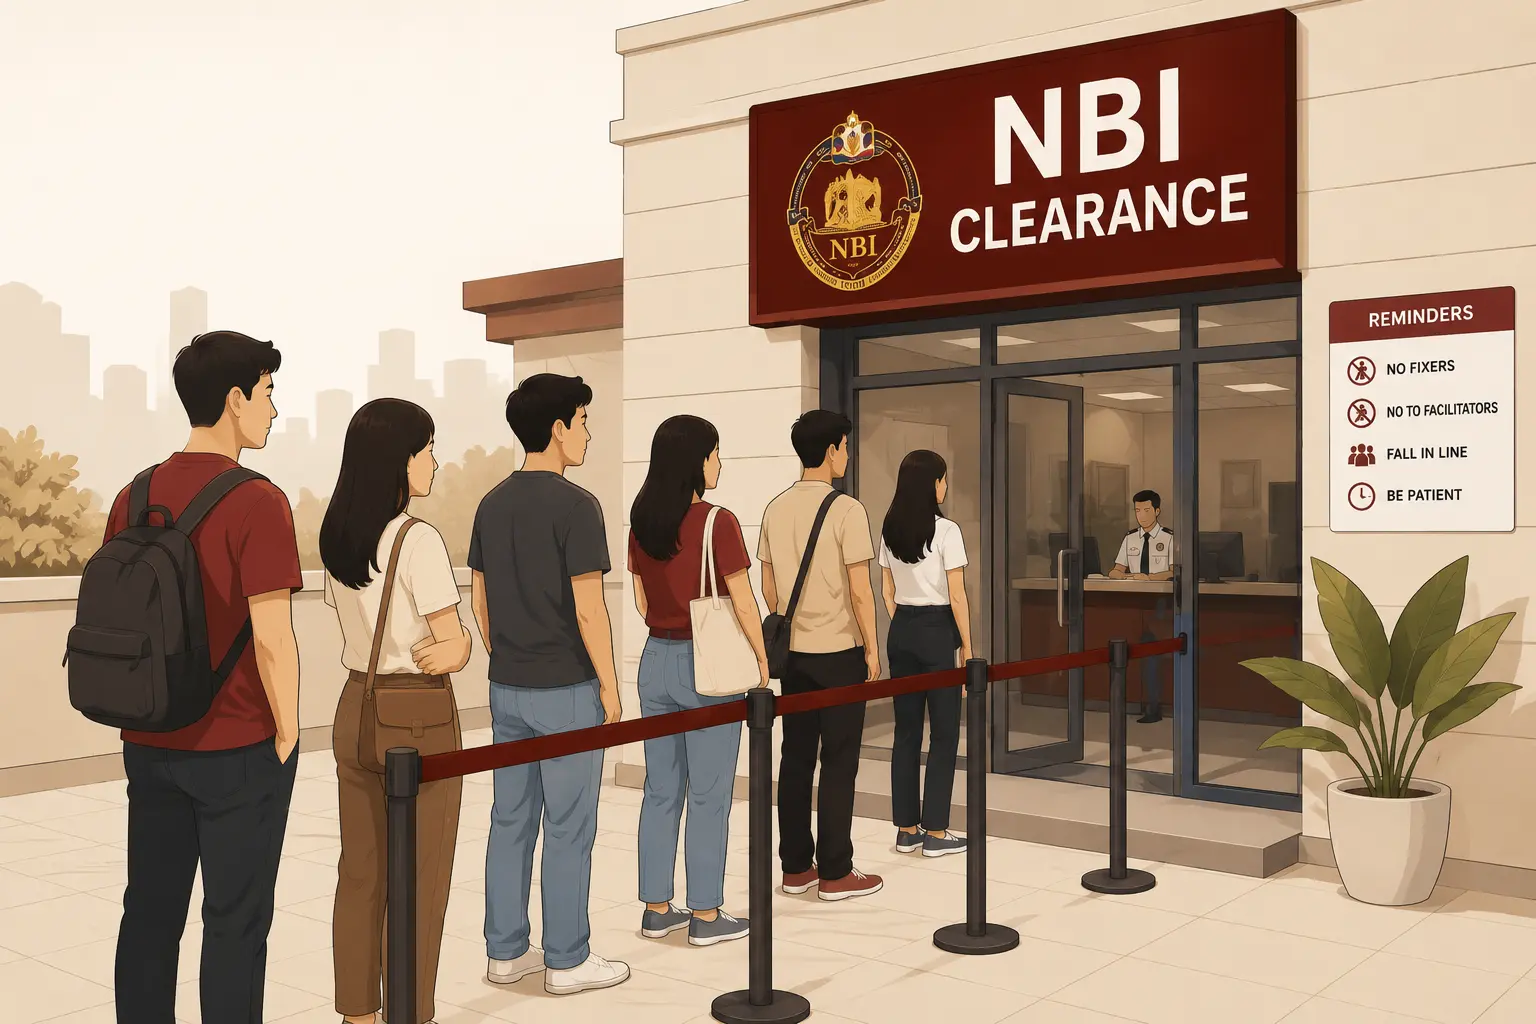
Can You Go to NBI Without an Appointment?
Walk-in applicants without an online appointment may be accommodated at some NBI branches depending on daily queue capacity and available slots. However, this is not guaranteed. You could arrive at the NBI office and be told to come back with a proper online appointment.
The NBI strongly recommends booking online to save time and avoid long queues. Without an appointment, you are at the mercy of whatever space is left over after scheduled applicants are served. For most branches, especially in busy cities, walking in without an appointment almost always results in being turned away. Some people don’t know the difference between NBI & Police Clearance and consider both the same. However, both are totally different things.
Frequently Asked Questions
Sources and Official Contacts
There are many NBI Clearance Centers spread around the whole Philippines. If you need to contact the NBI directly, use the following official channels
Official Website
NBI Main Office
Hotline
Email Support
Official Facebook Page
Page structure redesigned 16 October 2026; content last verified 27 June 2026.